This is a minimal example bootloader that is intended for educational purposes. It is meant to demonstrate how an operating system that uses BIOS boot can bootstrap itself to enter PML4 paging and long mode ("64-bit mode") on an x86_64 system. It uses the GNU toolchain and AT&T style assembly.
The file that is always required is an assembly file that gets written into the
MBR. Its size is limited to 440 bytes (by restriction of the MBR). During boot,
it is located at linear 0x7c00 as defined by the IBM compatible PC
specification. Usually, it uses int 10h and int 13h to change the display
and load the next stage from disk using BIOS function calls.
In the long-mode example, the MBR loader already performs the switch to
protected mode, but does not enable paging yet. It loads the stage 1 code to
linear 0x8000 and it always loads exactly 128 sectors (64 kiB) from disk,
partition 1, without looking at the partition table at all. It expects a 32-bit
function pointer to the entry of stage1 at 0x8000, and as a last action to
hand off to stage1, performs an indirect jump to the address found there.
The next stage consists of a loader that may be a combination of C and assembly
code. If the stage 0 is named xyz.s, the files that the script will look for
are named xyz_stage1.s and/or xyz_stage2.s. There is a mix of assembly and
C allowed because this makes it much easier to transition into long mode (from
assembly) while keeping all C code 64-bit exclusively.
In the long-mode example, the stage 1 loader has its entry point in the
assembly code, where it assumes to be in protected mode. It then initializes
IA-32e long mode by enabling PAE, loading %cr3 with a pointer to a valid PML4
structure and setting LME in IA32_EFER. Finally, it activates paging. The
first 2 MiB of memory are identity-mapped and a second 2 MiB hugepage is mapped
at 1 GiB linear (mapped to 32 MiB physical). This enters initially
compatibility mode but immediately after, a new 64-bit GDT is loaded as well
followed by a far jump which enables full 64 bit mode. Then a call is made into
the stage 1 C code.
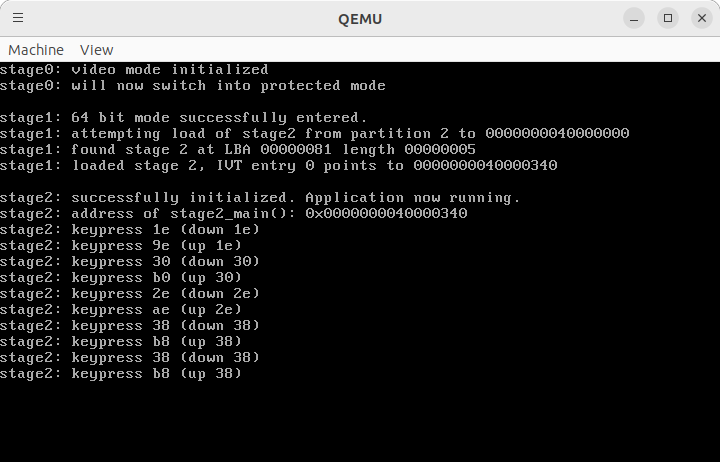
The stage 1 C code implements an exceptionally rudimentary ATA driver that reads the partition table and determines the extents of partition 2. It then reads the data from partition 2 into the memory at 1 GiB. It expects an IVT at the beginning of the code (i.e., a 64-bit function pointer to the linear address of the stage 2 entry point). From C, it then casts this 64-bit value into a function pointer and calls it to invoke stage 2.
The application is now running in 64-bit mode, in a non-identity-mapped memory space. The example uses in/out commands to display keyboard presses.
There is a build script which collects all files and then builds the ELF
files as well as a partitioned disk image that is bootable using QEMU or Bochs
(and which should also work on an actual PC). You always specify the MBR
bootloader assembly file and it automatically collects other files (if present)
for stages 1 or 2.
You can automatically have the program run using QEMU (-r option) or Bochs
(-b option). Full options below:
$ ./build --help
usage: build [-h] [--disk-size kib] [-t path] [-n] [-b | -r] [--no-optimization] [-d] [-v] asm_src

Build and run bootloader code.

positional arguments:
  asm_src               Assembly source code to build

options:
  -h, --help            show this help message and exit
  --disk-size kib       Disk size in kiB. Defaults to 1024
  -t path, --target-directory path
                        Output directory for objects. Defaults to target
  -n, --no-build        Do not build code.
  -b, --run-bochs       Run code using Bochs.
  -r, --run-qemu        Run code using QEMU.
  --no-optimization     Disable compilation of code using optimization.
  -d, --debug           Enable debugging; for QEMU, make it listen for a gdb connection. For Bochs, start in debugging mode.
  -v, --verbose         Increases verbosity. Can be specified multiple times to increase.

$ ./build longmode_example.s -r
The last command will compile all files into the target/ directory and
automatically run the QEMU image:
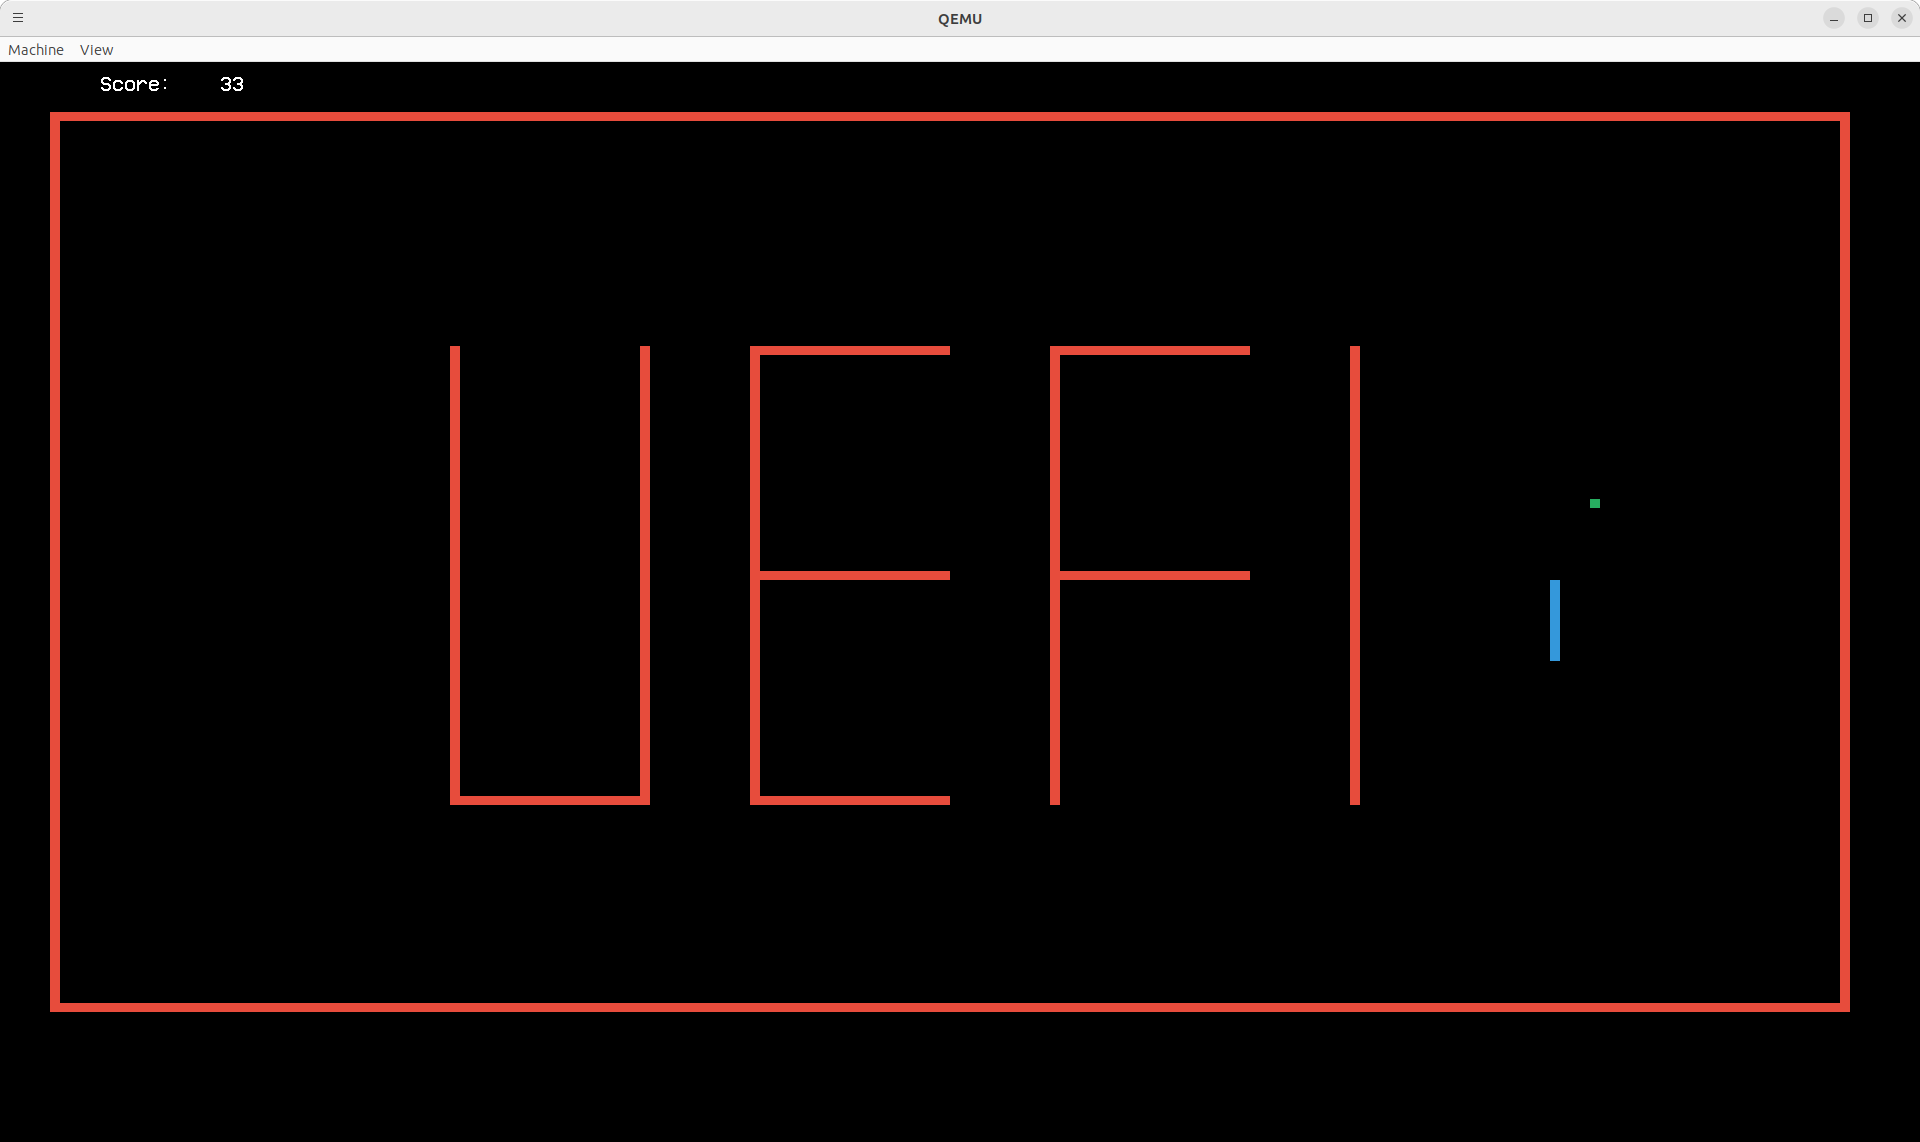
There's a second example provided that functions entirely different; it does not use BIOS boot, but instead uses x86_64 UEFI. This is much more powerful and also boring, because UEFI does all the hard work for you. An EFI bootloader is literally a EXE-file (PE) on a VFAT partition, that's it.
To demonstrate what is possible, I've coded a snake example, called uefisnek. After all, the real thrill of playing computer games is when your game runs in ring 0 with identity-mapped physical memory.
You can easily build it using gnuefi and the provided Makefile. For your
playing convenience, I've also provided binary/uefisnek.efi as a compiled
binary that should just run out-of-the-box.
If you want to configure grub to chainload uefisnek, it is easiest to place
uefisnek.efi in your UEFI partition at /EFI/uefisnek/uefisnek.efi, edit
/etc/grub.d/40-custom and append the following:
menuentry 'UEFI Snek' {
	insmod part_gpt
	insmod fat
	search --no-floppy --fs-uuid --set=root C693-8150
	chainloader /EFI/uefisnek/uefisnek.efi
}
You only have to fix your EFI partition ID (C693-8150 in my case) and you
should be able to run uefisnek on bare metal.
uefisnek uses a few interesting UEFI features such as graphics modes (it
prefers full HD but works on other resolutions as well) and timers/events (so
it should work at the same speed on every hardware). It uses a xorshift PRNG
that is seeded by rdtsc measurements at keypresses. I attempted to use
rdrand, but that made my UEFI crash. Not sure why.
GNU GPL-3.